📐 Precision Profile Scriber – Adjustable Contour Tracing Tool with Pen Lock | Buy 1
📐 Precision Profile Scriber – Adjustable Contour Tracing Tool with Pen Lock | Buy 1
Couldn't load pickup availability
- American express payment method
- Apple pay payment method
- Diners club payment method
- Discover payment method
- Google pay payment method
- Master payment method
- Paypal payment method
- Shopify pay payment method
- Visa payment method
-
Ordered
- - -
Order Ready
- - -
Delivered

📐 Precision Profile Scriber – Adjustable Contour Tracing Tool with Pen Lock | Buy 1
Trace Irregular Edges for Better Material Fitting
Adjustable Contour Scribing Tool with Pen Lock
Follow walls, trim, pipes, moldings, and other compatible profiles while marking a corresponding cut line on tile, laminate, carpet, wood, or similar project material.
⚠️ Marking-tool safety: The pointed tracing end may scratch surfaces or puncture skin. Test the selected end on a hidden area, secure the workpiece, and keep hands away from cutting tools used after marking.
📐 Transfer Difficult Profiles with Less Guesswork
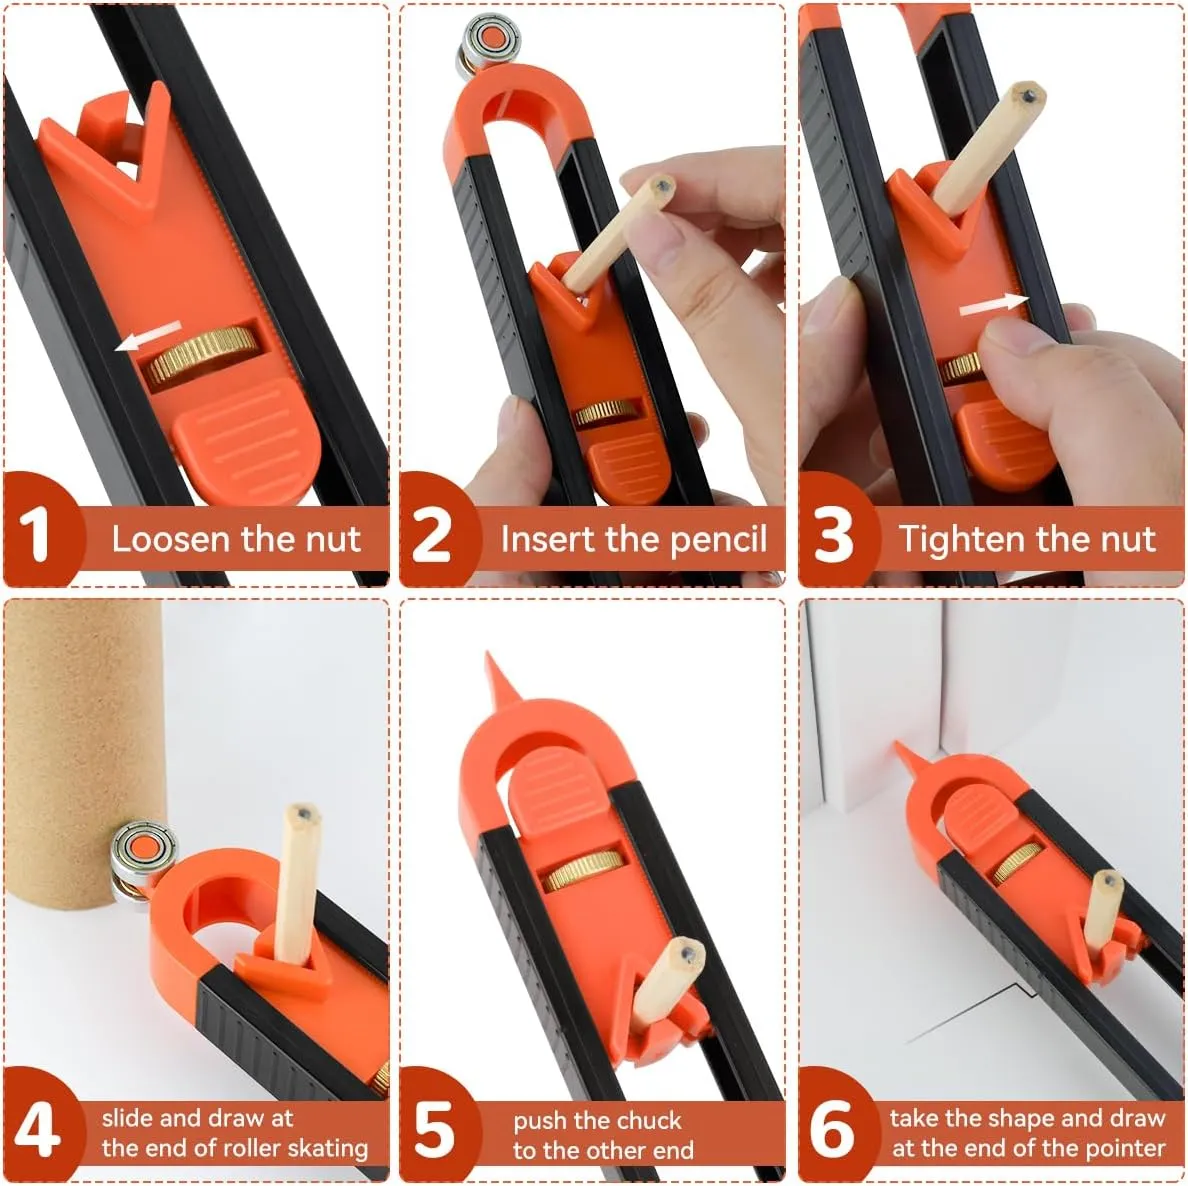
Secure a compatible pen in the adjustable holder, guide one end along the reference surface, and mark a corresponding line on the material being fitted.
Accuracy note: Results depend on pen position, tool angle, parallel movement, surface condition, hand control, and the clearance required for installation.
![gif.mp4 [video-to-gif output image]](https://www.bestemall.com/cdn/shop/files/image/5f745a8f05de98a9c89978ba54afa54d355b8672.gif "gif.mp4 [video-to-gif output image]")
Core Features
Trace, Offset, and Mark in One Controlled Motion
🧰 Compact Contour-Marking Design
The slim profile is designed for carrying in a toolbox or project bag and for reaching areas where a larger contour-copying tool may be inconvenient.
This is a manual scribing and marking aid. It does not digitally measure, calculate dimensions, cut material, or guarantee a finished fit.
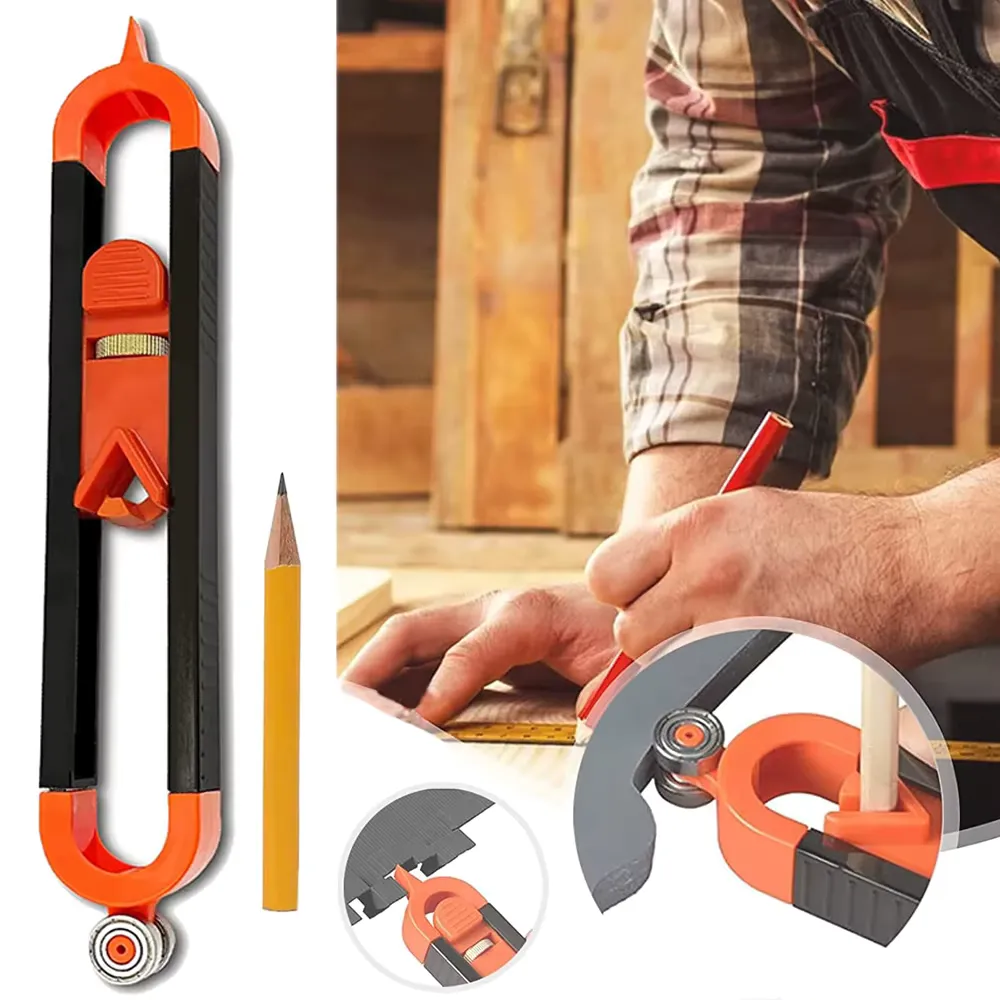
✏️ Adjustable Pen Holder
Turn the adjustment control to secure a compatible marking pen or pencil at the required offset before tracing the reference edge.
Pen diameter range and compatibility were not supplied. Confirm that the writing instrument is held firmly without crushing its body or allowing it to slip.
↔️ Trace and Mark at the Same Time
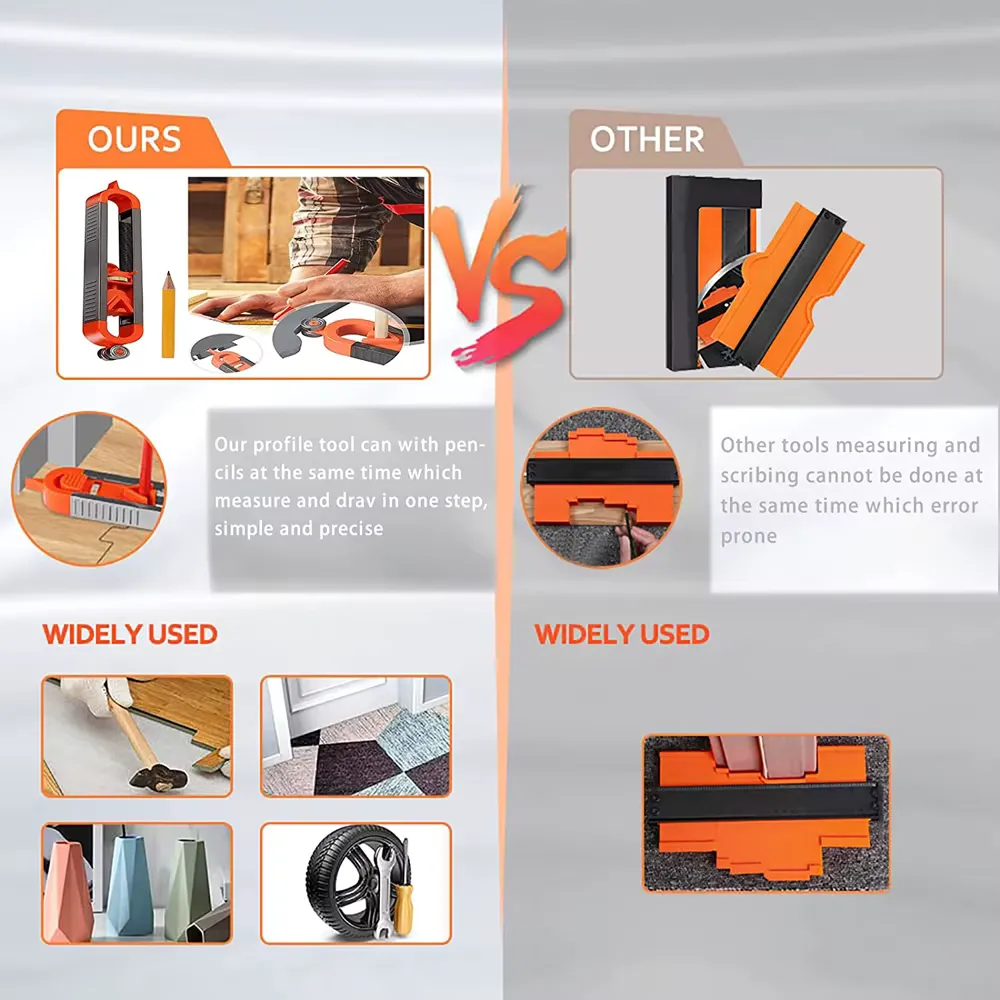
Guide the contact end along a wall, trim profile, pipe, molding, or other suitable reference while the secured pen marks the corresponding line on the project material.
Keep the tool orientation consistent and move it parallel to the intended cut plane. Tilting or rotating the tool can alter the transferred profile.
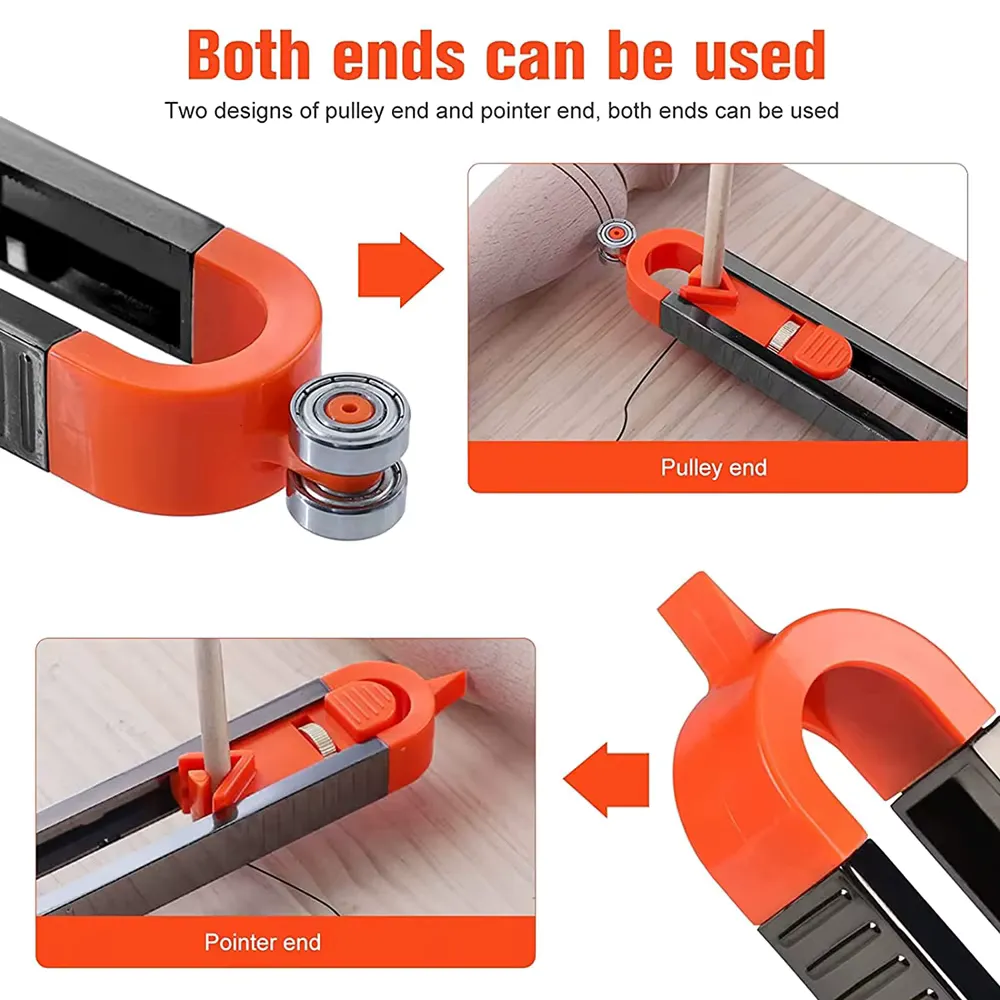
🔄 Metal Contact Roller
Use the roller end to follow compatible straight, curved, or uneven reference surfaces with rolling contact rather than dragging a pointed tip across them.
Surface limitation: A roller may still leave marks, compress soft material, collect debris, or slip on polished surfaces. Test first and keep the roller clean.
📍 Pointed Tracing End
The pointed end can reach narrower corners and more defined profile changes where the roller may not make complete contact.
Use light pressure. The pointed end can scratch paint, finished wood, laminate, metal, plastic, stone, or other delicate surfaces.
🧱 ABS and Metal Construction
The supplied specifications identify a combination of ABS and metal components in a narrow handheld format.
Exact ABS grade, metal type, roller material, tip hardness, adjustment-thread material, impact rating, and service-life testing were not provided.
🧳 Toolbox-Friendly Size
At approximately 233mm long, the tool can be stored with common layout, marking, and fitting equipment without requiring a large case.
How to Use
Set Up and Trace the Profile Carefully
Potential Applications
Useful for Selected Fitting and Layout Tasks
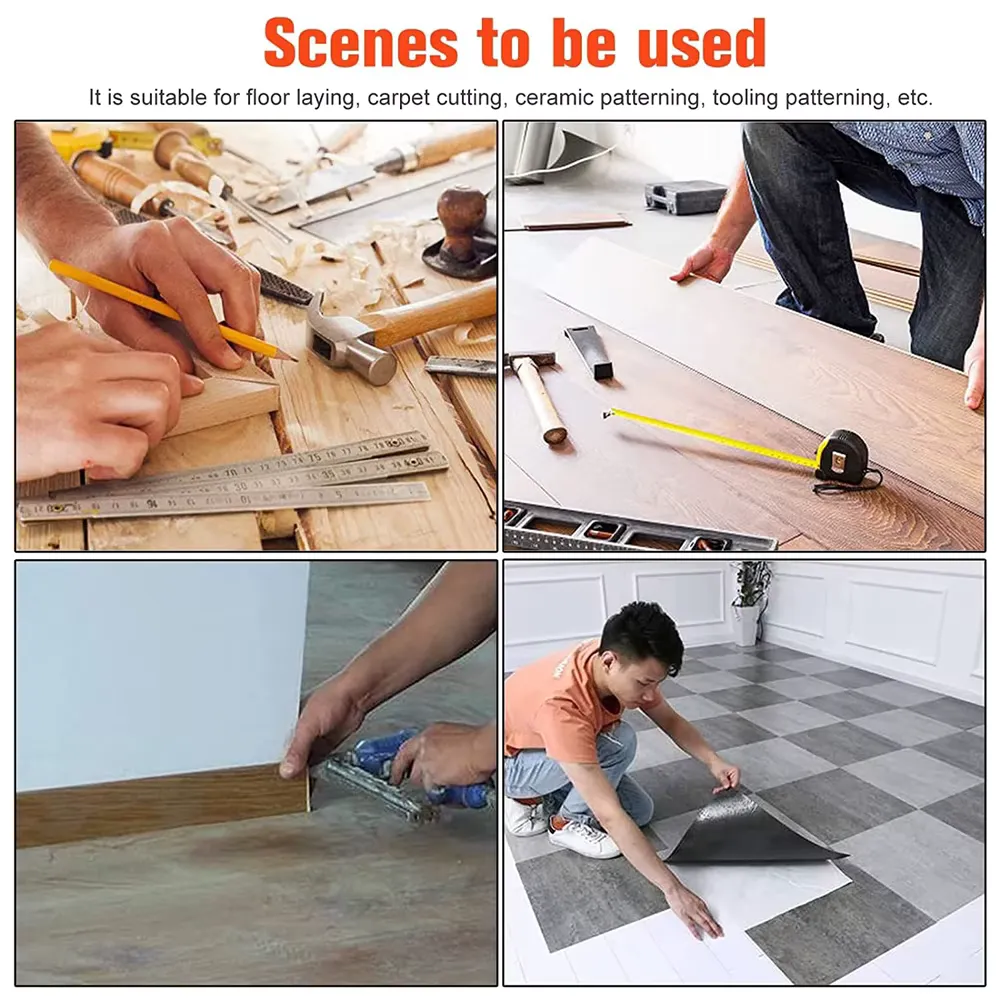
🪵 Woodworking: Trace wall irregularities or adjoining profiles onto trim, panels, and other suitable workpieces.
🧱 Tile fitting: Mark compatible tile around walls, pipes, corners, and trim before cutting with the appropriate tile tool.
🏠 Laminate installation: Transfer selected wall or molding profiles while allowing the expansion gap required by the flooring manufacturer.
🧶 Carpet and sheet material: Mark an outline before cutting with a suitable blade on a protected work surface.
🚪 Molding and trim: Copy selected edge shapes where adjoining surfaces are not perfectly straight.
🔧 Home DIY projects: Use it for manual profile transfer where the dimensions and surface geometry are within the tool’s reach.
✨ Product Highlights
✅ Adjustable holder for compatible pens and pencils.
✅ Metal roller for accessible tracing surfaces.
✅ Pointed end for narrower profile details.
✅ Manual profile tracing and offset marking.
✅ ABS and metal construction.
✅ Compact format for toolboxes and project bags.
Product Information
Product Details
The original imperial dimensions placed the first two measurements in the opposite order. The conversion above follows the listed metric dimensions of 35 × 27 × 233mm.
Exact product weight, pen-diameter range, maximum offset, minimum tracing radius, measurement scale, replacement roller availability, tip hardness, load capacity, and accuracy tolerance were not specified.
⚠️ Surface and Marking Precautions
- Test the roller and pointed end on an inconspicuous area before tracing a visible finished surface.
- Dirt or grit on the roller can scratch paint, laminate, wood, plastic, stone, or metal.
- The pointed end may damage coatings and soft materials even under light pressure.
- Do not trace directly against live electrical cables, plumbing, glass edges, moving machinery, or hot surfaces.
- Choose a pen or pencil that marks the project material clearly without permanently staining it.
- Some inks can bleed through carpet, unfinished wood, porous tile, fabric, and other absorbent materials.
- Protect adjoining surfaces from accidental pen contact.
- Clean the roller and tracing end before moving between delicate or differently colored materials.
📏 Accuracy and Fitting Limitations
- The tool copies the path followed by the contact end; it does not verify that the path is correct.
- Keep the tool parallel to the workpiece and maintain consistent pressure throughout the trace.
- Do not change tool angle midway through the profile.
- Allow for blade width, saw kerf, grout joints, adhesive thickness, expansion gaps, edge finishing, and installation clearance where applicable.
- Make the first cut outside the final line when additional fitting or sanding may be required.
- Complex three-dimensional surfaces may not be accurately represented by a single flat traced line.
- Measure the marked part independently before cutting valuable material.
- Trial-fit the finished piece and adjust gradually rather than removing excessive material in one cut.
🪚 Cutting and Installation Safety
- The scribing tool marks a line but does not make the cut.
- Use the correct saw, knife, tile cutter, router, shears, or other cutting tool for the material.
- Wear the personal protective equipment required for the cutting operation, including eye, hearing, respiratory, and hand protection where appropriate.
- Secure the workpiece before cutting and keep hands outside the cutting path.
- Check for hidden fasteners, wires, pipes, glass, and other hazards before cutting installed materials.
- Follow flooring, tile, trim, carpet, and material-manufacturer installation requirements.
- Do not use the scribing tool as a lever, chisel, punch, pry bar, or cutting guide.
- Seek qualified assistance for structural work, electrical areas, plumbing penetrations, asbestos-containing materials, or unfamiliar power tools.
🖐️ Hand and Pointed-End Safety
- Keep the pointed end directed away from your body and other people.
- Do not carry the tool loose in a pocket or bag with the point exposed.
- Do not allow children to use or play with the tool.
- Avoid excessive pressure that could cause the tip or roller to slip suddenly.
- Do not tighten the adjustment control beyond what is necessary to secure the pen.
- Stop use if the body, roller, tip, holder, gear, or fasteners become cracked, bent, or loose.
- Store the tool in a secure position where the tracing point cannot cause injury or damage.
🧽 Cleaning, Inspection, and Storage
- Remove the pen or pencil before detailed cleaning and storage.
- Wipe dust, marking residue, adhesive, and debris from the body, roller, and pointed end.
- Rotate the roller by hand and confirm that it moves without binding.
- Do not immerse the tool or leave it exposed to rain, wet concrete, solvents, or corrosive chemicals.
- Avoid oiling the roller unless permitted by the product instructions, as oil can transfer to finished surfaces.
- Inspect the pen holder and adjustment control regularly for wear or slipping.
- Store the tool clean and dry in a toolbox or protective sleeve.
- Keep the roller and point separated from delicate tools, screens, lenses, and finished surfaces during transport.
Frequently Asked Questions
Before You Trace the First Profile
Why Choose It
A Compact Manual Aid for Irregular Fitting Work
Follow a reference edge while drawing the corresponding line on the workpiece.
Choose between a rolling contact surface and a pointed tracing end.
Secure a compatible marking instrument and set the required offset.
Mark suitable tile, laminate, carpet, wood, molding, and sheet material.
Store the approximately 233mm-long tool with common layout equipment.
Trace the Shape Before You Make the Cut
Secure the pen, test the offset, maintain a parallel motion, and verify every marked dimension before cutting project material.
Original Store Information Graphics
The following original images have been retained unchanged. Verify any shipping, tracking, insurance, delivery, refund, guarantee, customer-service, review, warehouse, pricing, or free-shipping statements associated with them against your current Shopify policies before publishing.